Cedar Migration Guide
This page contains the Cedar migration guide; it is split into the following bite-size sections that you can expand as you read them:
- Before you migrate
- Cedar device migration wizard
- Cedar initial setup (post-migration)
- After migration
To expand or collapse a section, click on the heading.
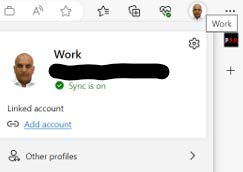
1. Open the Edge browser – Ensure you have opened the Edge browser on your current device and that you’re logged into your Edge browser by clicking on the top right corner to the left of the … (three dots) so that your favourites are synchronised. Ensure Sync is on
2. Log in to OneDrive – Please ensure that you are logged into OneDrive and the status shows as Your files are synced. Click on the OneDrive icon, usually located in your hidden icons tray on the bottom right, and the status is visible on the top.
![]()
3. OneNote Notebooks in the desktop version app of OneNote do not automatically save to your OneDrive. You must check that your Notebooks in your OneNote are saved to your OneDrive, and not saved locally to your device to prevent the loss of files before migration to Cedar.
4. Move your files to the appropriate corporate repository – Review files currently stored on your C:\ drive, Desktop, Documents, Downloads or Pictures folders. Delete if no longer required or move personal information to OneDrive. Business-related information should be moved to other appropriate corporate repositories.
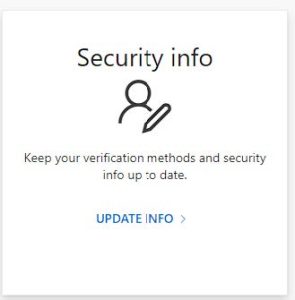
5. Register for Multi-Factor Authentication (MFA); see Appendix A. This can be done by going to https://myaccount.microsoft.com/ from your existing device (laptop/desktop) and clicking on the “update info” button under “Security Info”. MFA is a pre-requisite; without it, you cannot use or complete the migration to Cedar.
Important
- The migration to Cedar will take approximately 50 minutes (depending on your internet connection), and you need to have your device plugged into the charger. Watch the video that shows you what to expect during the migration.
- If you’re completing this migration from an office, please ensure you’re connected to the GovWi-fi network during the migration. Or you can connect to the office LAN using a network cable if one is available. You will need a network adapter if you have a DELL 5320, 5330 or 5340 device. Once your device has been built, you must reboot it once in Windows.
- CorpWi-Fi will only work once the device has been migrated to the Windows 10 Cedar build. Joining instructions for GovWi-fi can be found below if you have not enrolled already (one-time activity): https://www.wifi.service.gov.uk/connect-to-govwifi/
Migration
1. To migrate your device, double-click on the FMO Migration Wizard, which appears as an icon on your desktop. Please note this may not show immediately and may take up to 24 hours to appear.
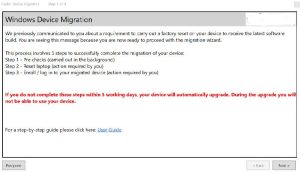
2. After clicking the wizard icon on your desktop, the first screen will be the ‘Windows Device Migration’ screen (shown below). This screen explains the three steps to migrate your device. Click ‘Next >’.
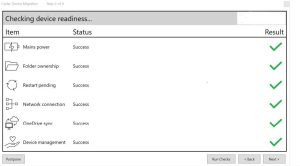
3. The next screen (shown below) will show you the status of the items required for the migration. Each ‘Result’ on the right-hand side must display a green tick to proceed.

If a green tick is not displayed, you need to take action by clicking on the resolve link(s) that will assist you.
4. Once all the items display a green tick, click ‘Next >’ (shown below).
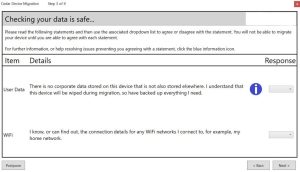
5. The following screen will check that your data is safe. Please follow the instructions on the screen to agree or disagree with the statements. To proceed, you’ll need to agree with each statement. Then click ‘Next >.’
6. The final screen will confirm that you are ready to migrate. Click on the ‘Migrate Now >’ button (shown below).
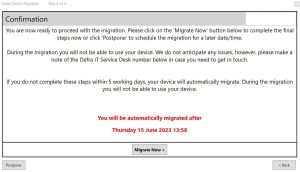
The device will now reset. You will see a progress indicator and a screen informing you that your laptop is being migrated. This might take 15-20 minutes (times may vary).
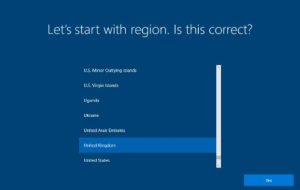
When the migration wizard has finished, you will see a screen that looks like the one below; select your region ‘United Kingdom’ when prompted and click ‘Yes’.
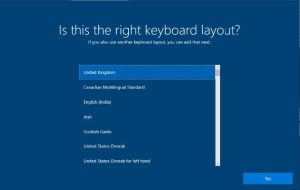
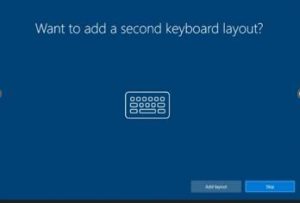
Select your keyboard layout. Click ‘Yes’, then ‘Skip’.
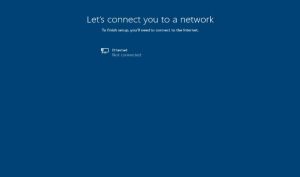
To finish the setup, you’ll need to connect to the network by selecting the network you want to connect to. If connecting from an office, you can only use GovWi-fi. Click ‘Connect’.
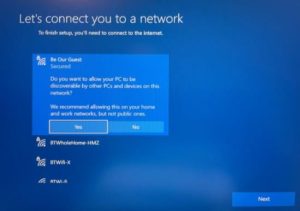
On the next screen, click on ‘Yes’ to allow your device to be discoverable to networks. Then select ‘Next’.
 Do not turn off the device. The device may restart multiple times for the setup to continue.
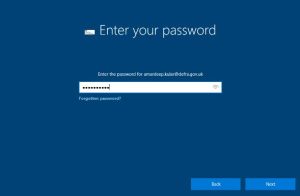
Once finished, a ‘Welcome to’ screen will appear once your device has restarted. It will ask you to log in using your work e-mail address and network password. Complete these fields and click ‘Next’ for email and password screens.
 You may also receive a prompt that the firmware (TPM) of the device is being updated. This is normal
For this next step, you’ll need the Microsoft Authenticator app you downloaded onto your phone in the ‘Before your migration’ section. Without it, you will not be able to complete the migration process.
A screen called ‘Help us protect your account’ will appear. Click ‘Next’.
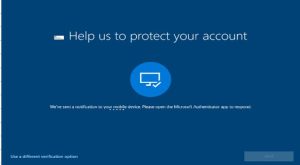
Once you approve the sign-in (match the number you see on the screen with the number on your authenticator app) on your mobile device, you will see the following screen on your laptop device. This process stage can take up to 30-40 minutes to complete.
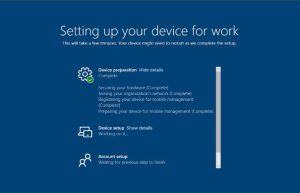 Your device will restart during this process; when it does, you will need to log in again using your work email address and network password. You may receive another MFA prompt when you log in for the first time.
Set up Windows Hello to sign in faster and more securely. If you have a Dell 5330 device or above, you can also use facial recognition to make logging in convenient. Select one option and click ‘Set up’.
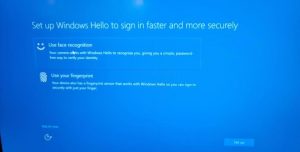
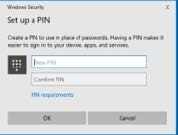
After this, the device will finish setup and ask you to create a PIN and/or set up a fingerprint. Click “Next”
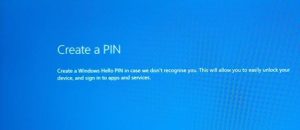
You may receive a MFA prompt when you setup a PIN, this only happens during PIN setup or password reset.
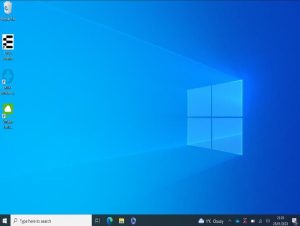
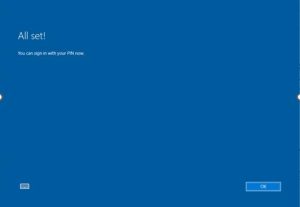 Congratulations, you should now be able to see your desktop.
Additional icons will show once the desktop has appeared (can take up to 2 hours). Some icons will be imported and may not work; this is by design and should be deleted.
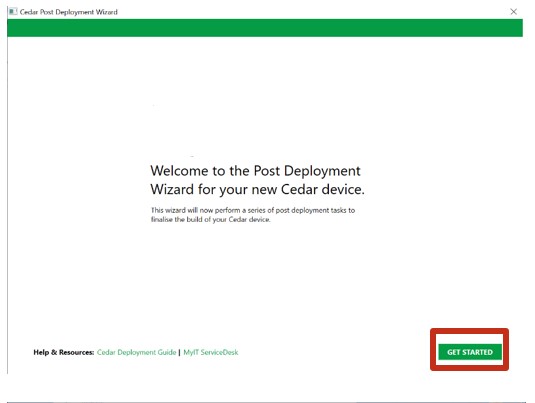
The next section is to ensure your device is made compliant with our policies The post deployment wizard will take approximately 15-20 seconds to launch the post deployment wizard click on GET STARTED
- You will receive prompts and pop-ups that ‘Chocolatey is installing…’ applications and prompts from ‘Intune Management is installing….’ applications. This is expected, and you should let it run its course.
- You may see Antivirus errors. This is normal because of a delay in your device connection synchronising. This is expected and will resolve itself within 48 hours.
Installing Applications
To install applications on your Cedar device, you must run the Company Portal App and install the applications assigned to you—type Company Portal in the start menu search bar.
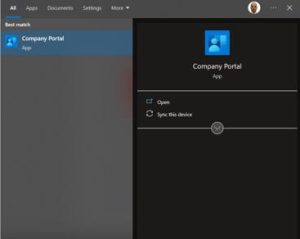
The company portal will allow you to install any applications you can access. You select the application you want to install by clicking install; it will show a blue tick once installed.